Studies
Studies are spaces where data is stored in a remote "bucket" for you to work on in Workspaces.
If you are doing a lot of intensive I/O file operations, you should copy files from Studies to your local disk ("C:" for Windows and "/" for Linux workspaces) and copy the files back afterwards.
If you are doing very intensive I/O consider loading the data into memory; if that is not an option you can request your workspace's local disk be given higher performance via the Teams channel listed at the bottom of this page.
You may need a bigger local disk to copy data to and from studies. If so, please request a new workspace configuration with a larger local disk via the same Teams channel.
Creating Studies
There are two types of Study available:
| Type | Description | Use case |
|---|---|---|
| My Studies | Specifies studies created for your own use. | Use this option to work on datasets that are exclusive to you or that are used specifically for your research and others do NOT need access to. |
| Organization Studies | Specifies studies that can be shared with other users. | You can grant access to this data to other users on a Readwrite or Readonly basis. |
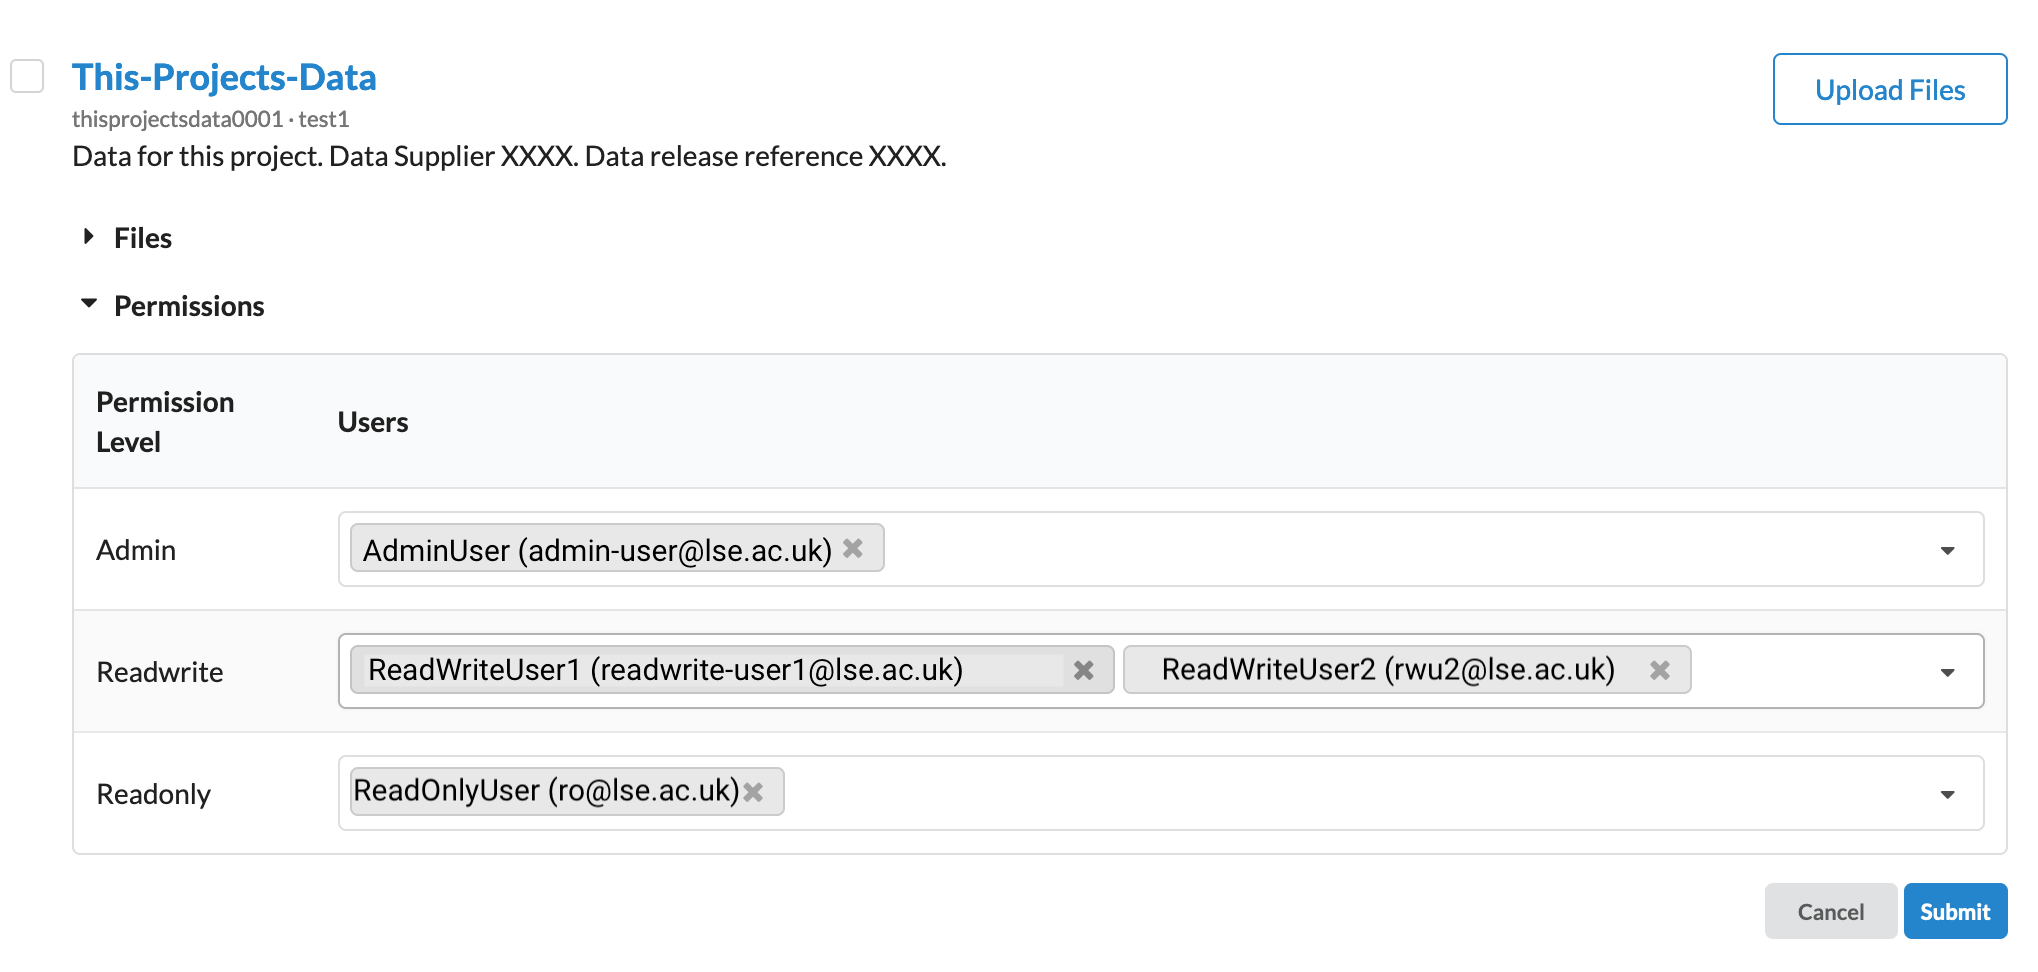
Within Organization Studies there are three access permissions levels:
| Level | Meaning |
|---|---|
| Admin | Means you can add files through the web interface and you can grant other users read-write or read-only privileges. |
| Readwrite | Means you can read and write files from within workspaces. |
| Readonly | Means you can read but not write files from within the Study. Ideal for reference data that should not be changed. |
Example study
The following steps explain how to create an example Organization Study and grant users access to the data in that study. The users will be able start a workspace, attach a study and use the data in the study.
-
From the left-hand menu in Service Workbench, select Studies.

-
Click the button at the top right-hand corner of the screen.
-
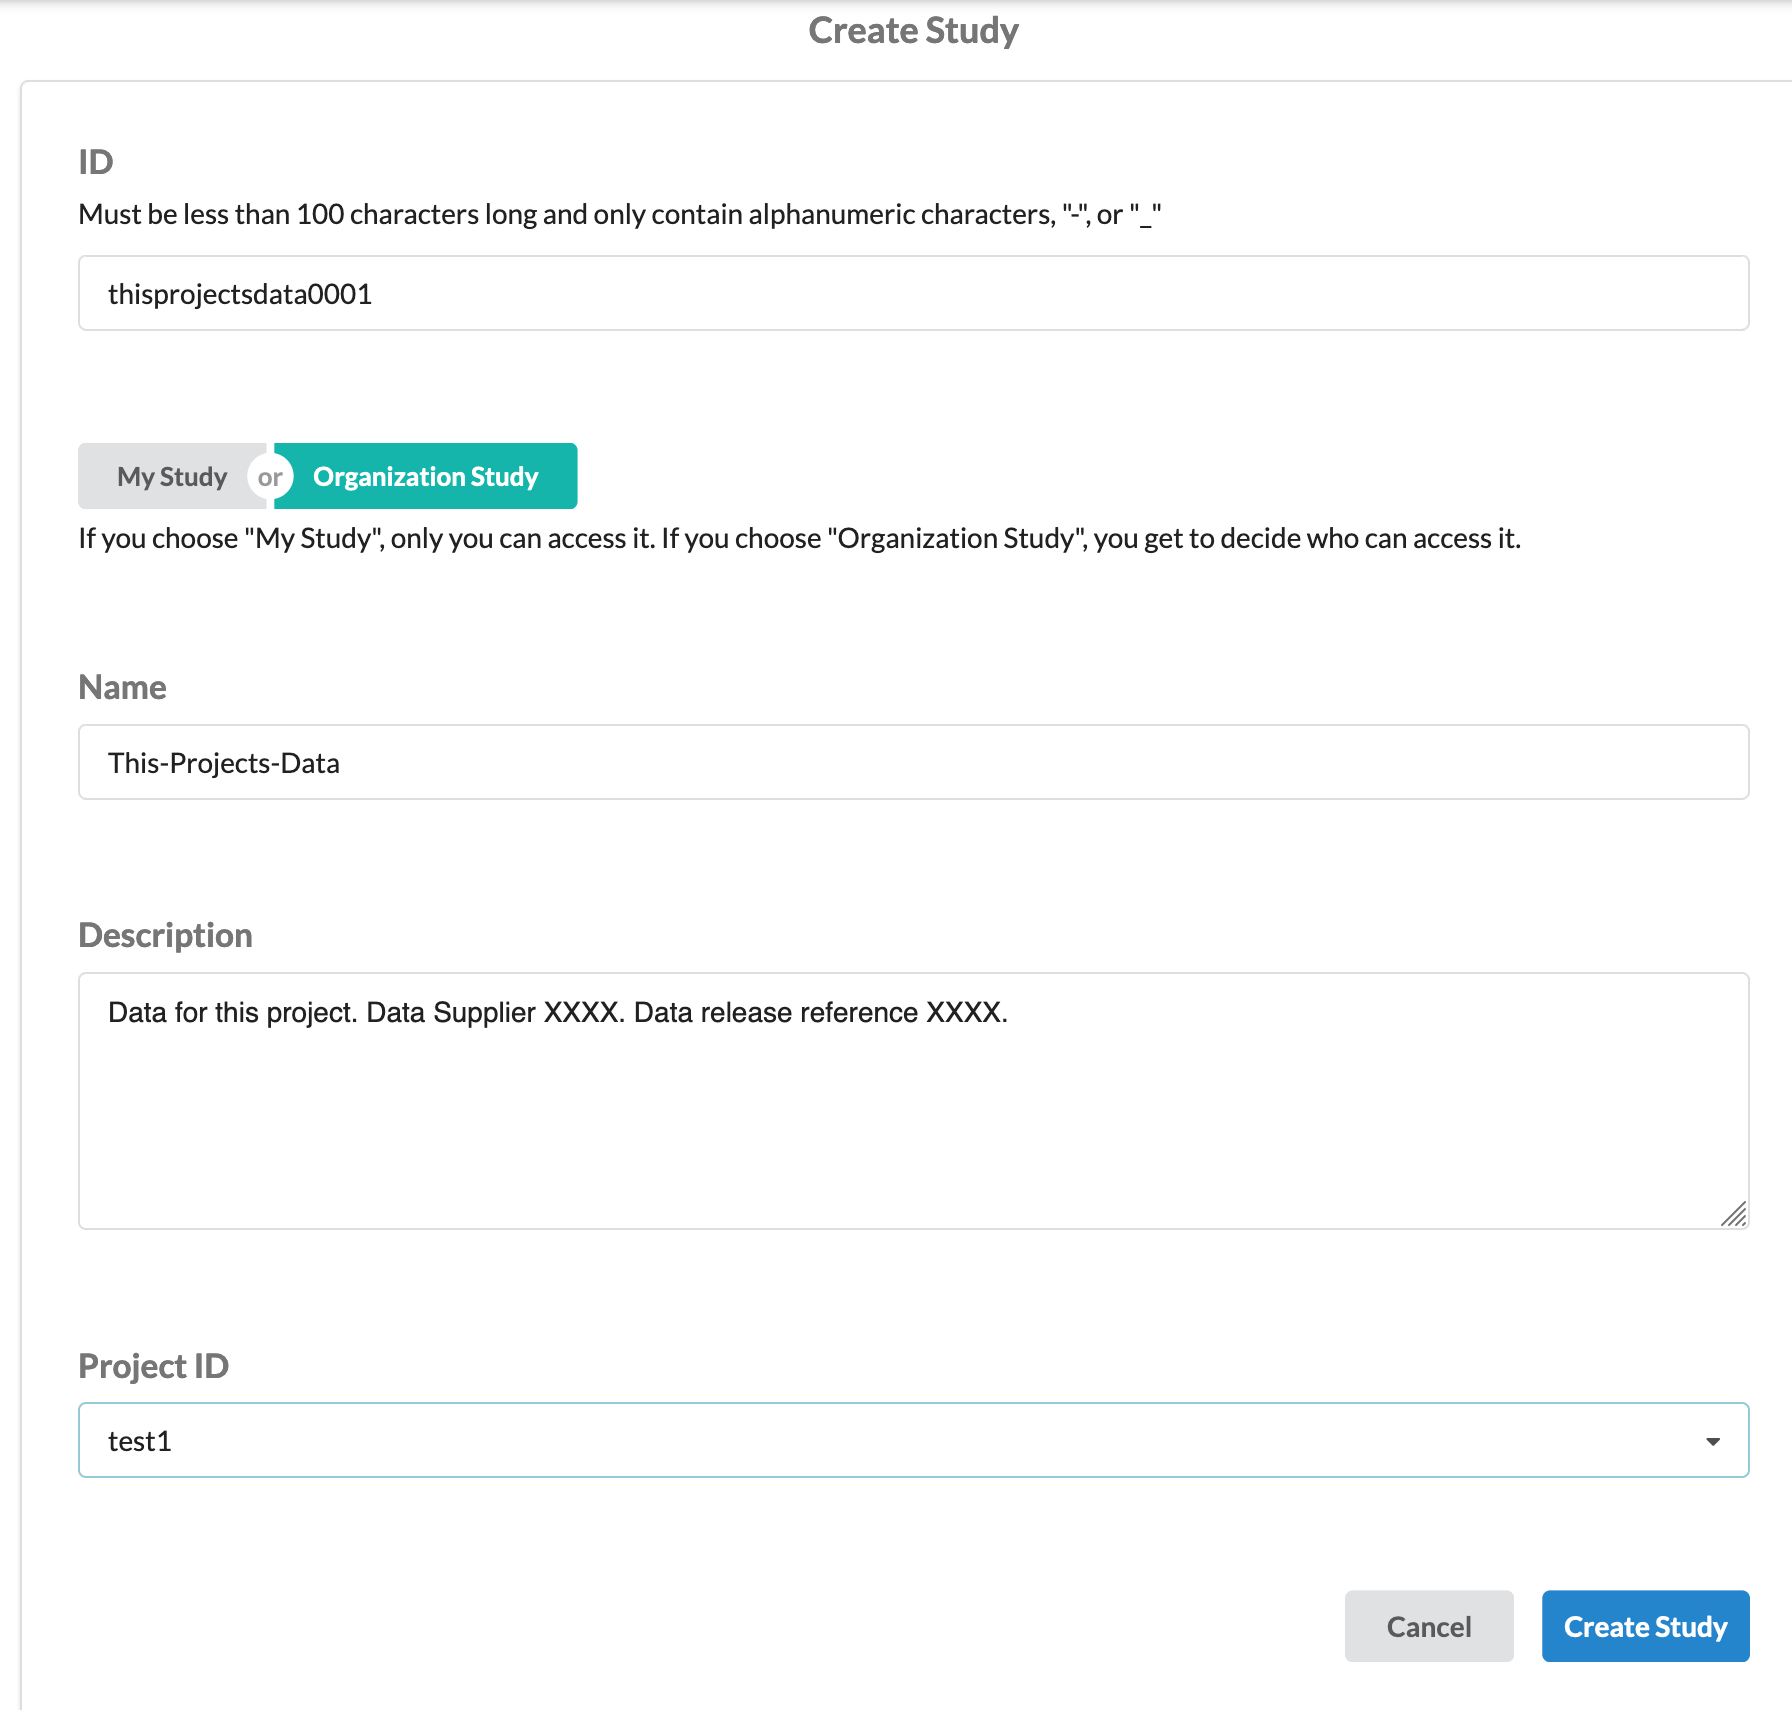
Complete the Create Study form, including an informative description of the study for the benefit of other users.

-
Set the study Permissions, assigning Admin, Readwrite or Readonly permission levels to users as required.

Admin permissions grant a user access to assign/revoke Admin, Readwrite or Readonly permissions to other users. They do not grant access to the data itself.
If you wish to grant access to others and have access yourself, you should assign yourself to the admin level and grant yourself either read-write or read-only permissions as well.
An admin will be able to create a workspace with the study attached, and they will see the study listed where the studies are mounted ("D:" for Windows Workspaces); however, unless they also have read-write or read-only permissions, they will not have access to the data in the study and it will appear to be empty.
If you are the last Admin and you remove your own Admin permissions, the Study will become unmanaged and no one will be able to grant/revoke permissions.
Should this happen, raise a service request and we will add you back as an Admin for that study.
Loading data into Studies
For open data or data you hold locally with no personal identifiers or confidentiality concerns, you or any admin of the study can add files from Service Workbench using the "Upload Files" button (on the right-hand side of the study). The Uploading data yourself section below explains how to do this.
For data with personal identifiers or confidentiality concerns, you must contact us to arrange a secure transfer (see Securely uploading and transferring other datasets and files below).
Uploading data yourself
-
Under the study, click the button.

-
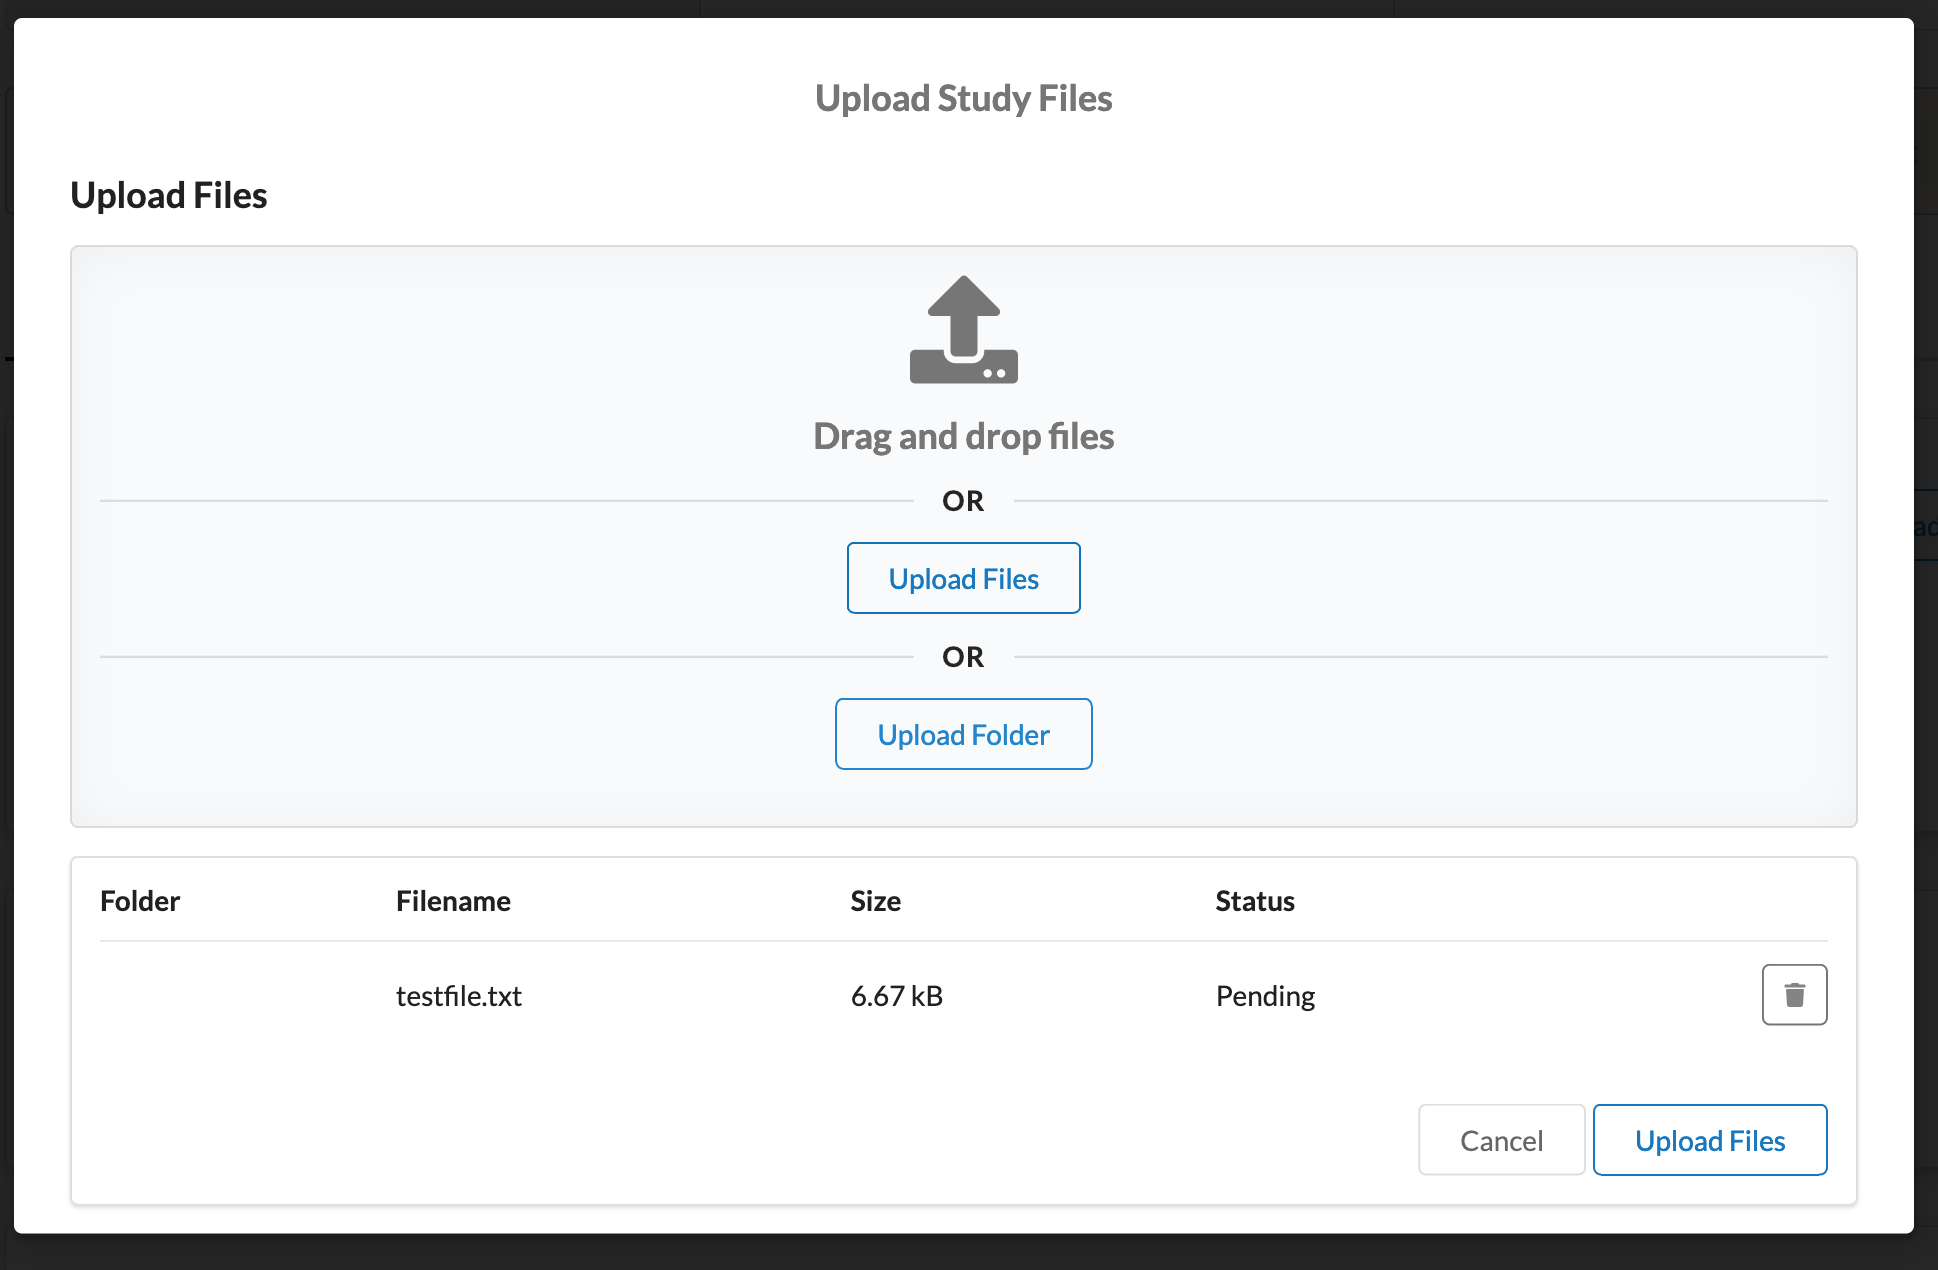
Drag and drop files or click one of the or buttons, then click the button.

There is a limit of 5G for any single file uploaded though this interface. If you need to upload a larger file you can either, compress it, split it up and join it again or contact IT Support via the Teams channel listed below.
Once you select files or folders they will stay as Pending until you click the final button.
If you have selected a lot of files the list of files will be long and you will have to scroll down a long way to find the button.
If you want to upload most of the files from a folder but not all you can upload them all then use then use the bin icon to remove the files you do not want to upload.
Securely uploading and transferring other datasets and files
For loading sensitive datasets or the migration of data from LSE sources, please raise a service request and we will transfer the data to a study for you.
For sensitive datasets from third-party suppliers, such as NHS England, we have a separate Data Loading environment which provides you with a web browser that is able to save files into a folder we can transfer to a study.
If you want to use this service, please let us know via the Teams channel at the bottom of this page and we will start the service, grant you access and arrange a Teams meeting to guide you through your data upload. Once you have loaded your data, we will transfer it to a study and it will be available to the users you grant access to.
If you have regular data feeds that need to come into the environment, we can work with you to create an automated workflow to get the data into a study.
Deleting a study
There is no user interface for researchers to delete a study. If a study needs to be deleted, please remove all user access to it and contact IT Support via the Teams channel listed below.
If you experience issues creating or using Studies or need a hand please contact us in the LSE-Trusted-Research-Environments Teams channel